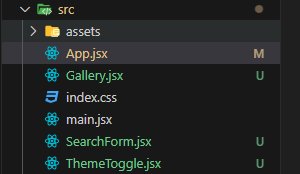
이번에는 기존에 만들어 놓은 이미지 갤러리를 REACT로 변환할 것임

새로운 프로젝트 생성


import Gallery from "./Gallery";
import SearchForm from "./SearchForm";
import ThemeToggle from "./ThemeToggle";

function App() {
  return (
    <main>
      <ThemeToggle />
      <SearchForm />
      <Gallery />
    </main>
  );
}

export default App;
기존에 사용하던 css
index.css에 붙여넣기
/* 폰트는 항상 제일 위에 Import Google font - Poppins */
@import url("https://fonts.googleapis.com/css2?family=Poppins:wght@400;500;600&display=swap");

/* 초기화 작업  */
/* margin, padding 0 , box-sizing -- border size */
* {
  margin: 0;
  padding: 0;
  box-sizing: border-box;
  font-family: "Poppins", sans-serif;
}

h1 {
  text-align: center;
  margin-top: 50px;
}

/* 이미지 갤러리 스타일링 */
.gallery {
  display: flex;
  flex-direction: column;
  align-items: center;
}

/* 이미지 박스 컨테이너 */
.gallery .images {
  /* 이미지 사이 간격 */
  gap: 15px;
  max-width: 85%;
  margin: 40px 0;
  columns: 5 310px;
  /* 5열 컬럼을 만든다 */
  list-style: none;
}

/* 이미지를 담는 박스 */
.gallery .images .img {
  display: flex;
  cursor: pointer;
  /* 커서 올리면 포인터로 바뀜 */
  overflow: hidden;
  /* 안의 이미지가 밖으로 나올 때 안보이게함 (숨김) */
  position: relative;
  margin-bottom: 14px;
  border-radius: 4px;
}

.gallery .images img {
  width: 100%;
  transition: transform 0.2s ease;
}
.gallery .images .img:hover img {
  transform: scale(1.1);
}
context.jsx생성

import { createContext, useContext, useState, useEffect } from 'react';

const AppContext = createContext();

// 브라우저에 다크모드 세팅 또는 마지막으로 다크모드로 사용했을 경우 true리턴됨.
const getInitialDarkMode = () => {
	const prefersDarkMode = window.matchMedia('(prefers-color-scheme:dark)').matches;
	const storedDarkMode = localStorage.getItem('darkTheme') === 'true';

	return storedDarkMode || prefersDarkMode;
};

export const AppProvider = ({ children }) => {
	//다크모드 설정되어 있지 않으면 라이트(false) 모드로 시작함.
	const [isDarkTheme, setIsDarkTheme] = useState(getInitialDarkMode());
	//검색어는 처음에 cat으로 시작
	const [searchTerm, setSearchTerm] = useState('cat');

	const toggleDarkTheme = () => {
		const toggle = !isDarkTheme;
		setIsDarkTheme(toggle);
		localStorage.setItem('darkTheme', toggle); //다크모드가 바뀔때마다 브라우저에 저장
	};

	useEffect(() => {
		document.body.classList.toggle('dark-theme', isDarkTheme);
	}, [isDarkTheme]);

	return (
		// 다크모드상태와 토글업데이트함수, 검색어와 검색어업데이트 함수 전역으로 전달.
		<AppContext.Provider value={{ isDarkTheme, toggleDarkTheme, searchTerm, setSearchTerm }}>
			{children}
		</AppContext.Provider>
	);
};

export const useGlobalContext = () => useContext(AppContext);
이전에 쓴 다크모드가 있으면 localstorage에 저장해놓고 전에 사용했던 다크모드(라이트, 다크) 를 가져온다.
:root {
  /* dark mode setup */
  --dark-mode-bg-color: #333;
  --dark-mode-text-color: #f0f0f0;
  --backgroundColor: #f8fafc;
  --textColor: #0f172a;
  --darkModeTransition: color 0.3s ease-in-out,
    background-color 0.3s ease-in-out;
}

.dark-theme {
  background: var(--dark-mode-bg-color);
  color: var(--dark-mode-text-color);
}

body {
  background: var(--backgroundColor);
  color: var(--textColor);
  transition: var(--darkModeTransition);
}
다크 모드에 사용될 색상들을 변수로 지정한다.
main.jsx

컨텍스트 적용

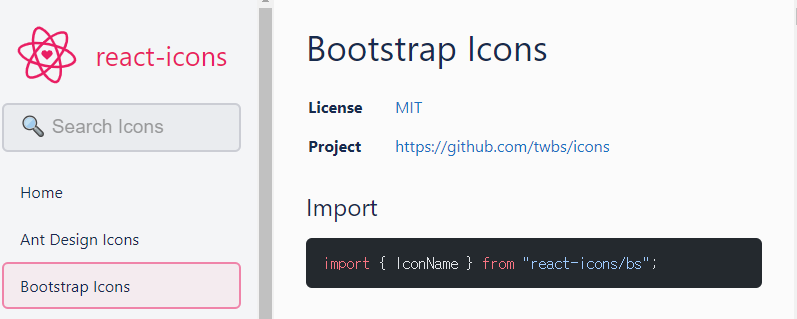
https://react-icons.github.io/react-icons/
React Icons
react-icons.github.io
리액트 아이콘을 설치해서 사용해본다.


ThemeToggle.jsx
import { BsFillSunFill, BsFillMoonFill } from "react-icons/bs";
import { useGlobalContext } from "./context";

const ThemeToggle = () => {
  const { isDarkTheme, toggleDarkTheme } = useGlobalContext();
  return (
    <section className="toggle-container">
      <button className="dark-toggle" onClick={toggleDarkTheme}>
        {isDarkTheme ? (
          <BsFillMoonFill className="toggle-icon " style={{ color: "white" }} />
        ) : (
          <BsFillSunFill className="toggle-icon" />
        )}
      </button>
    </section>
  );
};

export default ThemeToggle;


/* 테마 토글  */
.toggle-container {
  max-width: 1100px;
  margin: 0 auto;
  display: flex;
  justify-content: end;
}

.dark-toggle {
  margin-top: 20px;
  background-color: transparent;
  border-color: transparent;
  width: 5rem;
  height: 2rem;
  place-items: center;
  cursor: pointer;
}
.toggle-icon {
  width: 24px;
  height: 24px;
  flex-shrink: 0;
}

SearchForm.jsx
import { useGlobalContext } from "./context";

const SearchForm = () => {
  const { setSearchTerm } = useGlobalContext();
  const handleSubmit = (e) => {
    e.preventDefault();
    const searchValue = e.target.elements.search.value?.trim();

    if (searchValue !== null && searchValue.length > 1) {
      setSearchTerm(searchValue); //검색어를 공통으로 저장한다.
    }
    e.target.elements.search.value = ""; // 입력 후 공백으로
  };
  return (
    <section>
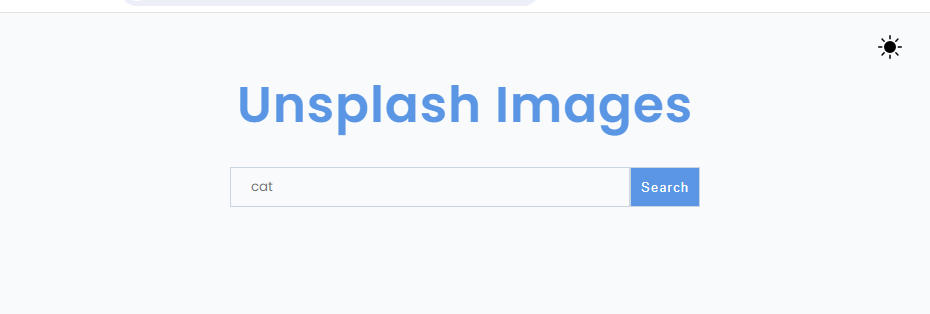
      <h1 className="title">unsplash images</h1>
      <form className="search-form" onSubmit={handleSubmit}>
        <input
          type="text"
          className="search-input"
          name="search"
          placeholder="cat"
        />
        <button type="submit" className="btn">
          search
        </button>
      </form>
    </section>
  );
};

export default SearchForm;

검색창에 검색어 입력 후 검색 버튼누르면
handleSubmit함수 실행 이벤트 발생한다.
검색어는 전역으로 사용할거라서
useGlobalContext()를 사용해서 setSearchTerm을 부른다
만약 searchValue에 값이 없으면 걍 리턴하고
값이 있으면 검색어의 값을 가져와서 setSearchTerm에 저장한다.

/* 검색창 */

.title {
  text-align: center;
  font-size: 50px;
  font-style: normal;
  font-weight: 700;
  line-height: 80px; /* 100% */
  letter-spacing: 1px;
  text-transform: capitalize;
  color: #5a96e3;
}

.search-form {
  margin-top: 32px;
  display: flex;
  align-items: center;
  justify-content: center;
  height: 20px;
}
.search-input {
  padding-left: 20px;
  width: 400px;
  height: 40px;
  padding-right: 0px;
  flex-shrink: 0;
  border: 1px solid #cbd5e1;
  background: #f8fafc;
}

.btn {
  color: white;
  background: #5a96e3;
  border: 1px solid #cbd5e1;
  height: 40px;
  width: 70px;
  text-align: center;
  font-family: Arial;
  font-size: 13.333px;
  font-style: normal;
  font-weight: 400;
  line-height: normal;
  letter-spacing: 1px;
  text-transform: capitalize;
}

useFetch.js생성
api를 사용해서 데이터를 가져올 때 사용함
import { useState, useEffect } from "react";

export const useFetch = (url) => {
  const [data, setData] = useState(null);
  const [isPending, setIsPending] = useState(false);
  const [error, setError] = useState(null);

  useEffect(() => {
    const controller = new AbortController();

    const fetchData = async () => {
      setIsPending(true);

      try {
        const res = await fetch(url, { signal: controller.signal });
        if (!res.ok) {
          throw new Error(res.statusText);
        }
        const data = await res.json();

        setIsPending(false);
        setData(data);
        setError(null);
      } catch (err) {
        if (err.name === "AbortError") {
          console.log("the fetch was aborted");
        } else {
          setIsPending(false);
          setError("Could not fetch the data");
        }
      }
    };

    fetchData();

    return () => {
      controller.abort();
    };
  }, [url]);

  return { data, isPending, error };
};
Join Unsplash | Unsplash
Creation starts here Access 5,660,453 free, high-resolution photos you can’t find anywhere else Uploaded about 15 hours ago by Andrej Lišakov
unsplash.com
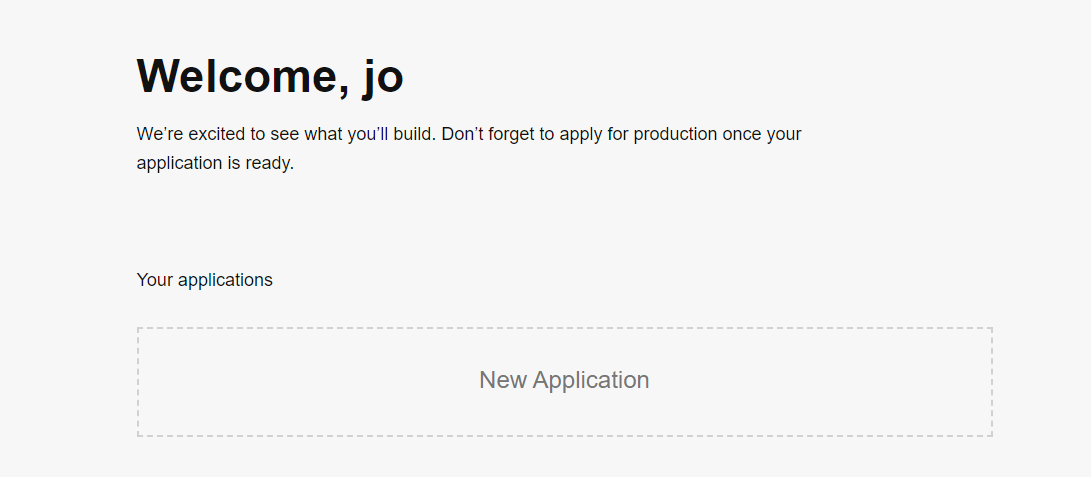
가입 후

이미지 갤러리라는 어플리케이션 생성하면
아래에 Keys가 나온다 .


.env 파일을 만들어서 해당 키를 저장한다.
https://unsplash.com/documentation#public-authentication
Unsplash API Documentation | Free HD Photo API | Unsplash
Getting started This document describes the resources that make up the official Unsplash JSON API. If you have any problems or requests, please contact our API team. Creating a developer account To access the Unsplash API, first join. Registering your appl
unsplash.com

https://unsplash.com/documentation#search-photos
Unsplash API Documentation | Free HD Photo API | Unsplash
Getting started This document describes the resources that make up the official Unsplash JSON API. If you have any problems or requests, please contact our API team. Creating a developer account To access the Unsplash API, first join. Registering your appl
unsplash.com

위의 파라미터들도 데이터를 가져올거임
Gallery.jsx
import React from "react";
import { useGlobalContext } from "./context";
import { useFetch } from "./useFetch";

//API주소
const url = `https://api.unsplash.com/search/photos?client_id=${
  import.meta.env.VITE_ACCESS_KEY
}`;

const Gallery = () => {
  //데이터 받아오기
  const { searchTerm } = useGlobalContext(); //전역 저장된 검색어
  const { data, error, isPending } = useFetch(`${url}&query=${searchTerm}`);
  console.log(data);

  //로딩중
  if (isPending) {
    return (
      <section className="image-container">
        <h4>Loading...</h4>
      </section>
    );
  }
  //에러있을경우
  if (error) {
    return (
      <section className="image-container">
        <h4>{error}</h4>
      </section>
    );
  }

  return (
    <section className="gallery">
      <ul className="images">
        {data &&
          data.results.map((item) => {
            const url = item?.urls?.regular;
            return (
              <li className="img" key={item.id}>
                <img src={url} alt={item.alt_description}></img>
              </li>
            );
          })}
      </ul>
    </section>
  );
};

export default Gallery;

사진 주소는
item의 urls안에 regular 의 값을 가져온다.


'FRONTEND > React' 카테고리의 다른 글
| [깃허브 앱] 새 프로젝트 시작, 테일윈드 설치 및 각 컴포넌트 생성 (0) | 2023.11.30 |
|---|---|
| 프로젝트 관리 (0) | 2023.11.29 |
| [HTML변환] HTML -> REACT 변환하기 (1) | 2023.11.28 |
| [쿠킹레시피] 배포하기 (1) | 2023.11.27 |
| [쿠킹레시피] 파이어 베이스 연결하기 (레시피 삭제하기) (2) | 2023.11.27 |
